Connecting a Flask Application to AWS RDS (MySQL)
Project Description Amazon Web Services (AWS) provides a managed SQL database service called Amazon Relational Database Service (Amazon RDS). Amazon RDS uses various database engines to manage the data, migrations, backup, and recovery. In this project, we will create a database instance of SQL over RDS. After that, we will create a key pair value, use a security group and make an EC2 instance using Amazon Machine Image (AMI). Then, we’ll use the endpoint of that database to connect it with the EC2 instance and install the required packages for the Flask application. In the end, we’ll deploy the Flask application on EC2 and connect the application to use the AWS RDS (MySQL) database. The AWS Command Line Interface (CLI) is a powerful utility to manage all AWS services through a shell prompt. You can use the CLI to access and configure various AWS services and automate tasks using scripts. For your convenience, the AWS CLI has been downloaded and installed using the official link Verify that the utility is properly configured by running the following command: When you’ve successfully run this command, you’ll see the version details of the AWS CLI. This ensures that the AWS CLI has been installed correctly. Use the following command to list all commands available through the AWS CLI: Press the “Q” key to exit and return to the shell prompt. Note: In this project, you’ll create and export some environment variables using the environment.sh bash script. Step 2: Configuration: To configure the AWS account, run the configure command available through the AWS CLI and enter credentials, region, and output format. A few sample regions available in the AWS CLI are listed in the following table: Region Name Region US East (Ohio) us-east-2 US East (N. Virginia) us-east-1 US West (N. California) us-west-1 Some sample output formats available through AWS CLI are shown below: Note: It’s recommended to create a new AWS AccessKeyId and SecretAccessKey by creating a new IAM User for this project. To learn how to generate these keys, follow this link. Make sure to set up the AmazonEC2FullAccess user policy for the IAM user. Type the following command in the terminal: After executing this command, add the following parameters: Step 3: Create a New RDS Amazon Web Services (AWS) provides managed SQL database services the called Amazon Relational Database Service (Amazon RDS). Amazon RDS provides various database engines to manage the data, migrations, backup, and recovery. Let’s create a new database using the aws rds command. Add the following parameters while creating a new RDS: After creating the RDS instance, assign the value of VpcSecurityGroups.VpcSecurityGroupId to the SG_ID variable in the environment.sh file. After adding the value to the file, use the following command to export the value: source environment.sh Step 4 : Describe DB Instances Use the aws rds command to list all DB instances associated with the AWS account. After describing the RDS instance, assign the value of Endpoint.Address to the RDS_ADDRESS variable in the environment.sh file. Note: The endpoint may take some time to show up because instances created in the previous task will take some time to be initialized. Run the following: source environment.sh Step 5: Add a New Inbound Rule to the Security Groups The security group has some default inbound and outbound rules. MySQL that will be running on port 3306. The inbound rule will specify the port number and IP range of the incoming traffic that the EC2 security group will allow. Add an inbound rule to the security group with the following parameters: Add two more inbound rules to access the EC2 with SSH and the Flask application. Use a command from aws ec2 to add these three inbound rules to the security group. Type the following command to add an inbound rule for Flask: Type the following command to add an inbound rule for SSH: Step 6: Create a New Key Pair In AWS, a key pair is a combination of public and private keys. The public key is encrypts data, while the private key decrypts data. These are the security credentials used to connect to the EC2 instance. Amazon EC2 instance stores the public key, and the user has their private key to connect to the instance. Let’s create a new key pair in the account using the aws ec2 command. You need to pass a key name to the command to create a key pair. The name of the key pair must be unique. Step 7: List all Key Pairs Let’s verify the creation of key pairs by listing all available key pairs in the account using the aws ec2 command. Step 8: Run an EC2 Instance Let’s launch a template using Amazon Machine Image (AMI) in this task. You can only launch instances of those AMIs for which you have permission. To launch an instance, get the AMI ID of the required operating system. Add the AMI ID in the AMI_ID variable in the environment.sh file. Use the following command to export the value: source environment.sh After getting Amazon Ubuntu’s AMI ID, use the aws ec2 command and pass these parameters to launch the instance: Type the following command to run an instance: After running the instance, copy the InstanceId from the output and assign it to the INSTANCE_ID variable in the environment.sh file. Use the following command to export the values: Step 9: Check the state of the EC2 instance After running an instance, we can check the state of the instance using the aws ec2 command. This will accept the InstanceId as the argument and output the complete details of the instance. Check the PublicIpAddress and State.name of the instance. If the state is not running, wait for a while and list the attributes of the instance again. After two minutes, notice the status of the instance again. It should be in running now. Note: Copy the PublicIpAddress of the instance and place it in the environment.sh file in the PUBLIC_IP. Next, export the variable using the following command: source environment.sh Step 10: Copy the Data from a Local Machine to EC2 machine: To deploy the Flask application over the EC2 instance, upload the application from a local machine to the EC2 instance. In this task, perform the following steps: GitHUB: https://github.com/skillupwithsachin/aws_rds_project_skill_up_with_sachin.git https://github.com/skillupwithsachin/aws_rds_project_skill_up_with_sachin# Type the following command to change the access permission of the file: Use the following command in the terminal to upload the zipped Flask application: After these commands,
Introduction to Database DevOps

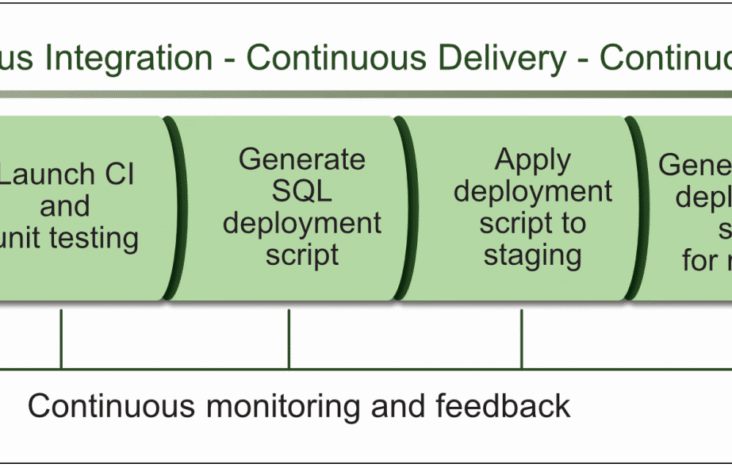
Many companies use automated processes (like pipelines) to manage their software code, deploy it, test it, and set up their computer systems. However, when it comes to working with databases (which store important data), they often don’t use these same automated methods. Instead, they handle databases in a separate way, and this causes a lot of problems. It’s now time to start using automation for databases too. What is Database DevOps? Database DevOps is a method that helps speed up and improve the way software is created and released. It focuses on making it easier for developers and operations teams to work together. When you want to create reliable products, it’s essential to make sure that databases and software work well together. With DevOps, you can build and launch both the software and the database using the same setup. We use DevOps techniques to handle database tasks. We make changes based on feedback from the stages where we deliver and develop applications. This helps ensure a smooth delivery process. Database DevOps Features : Database DevOps products typically have the following features: The Database Bottleneck (Source: Liquibase) A 2019 State of Database Deployments in Application Delivery report found that for the second year in a row, database deployments are a bottleneck. 92% of respondents reported difficulty in accelerating database deployments. Since database changes follow a manual process, requests for database code reviews are often the last thing holding up a release. Developers understandably get frustrated because the code they wrote a few weeks ago is still in review. The whole database change process is just a blocker. Now, teams no longer have to wait for DBAs to review the changes until the final phase. It’s not only possible but necessary to do this earlier in the process and package all code together. Top Database DevOps Challenges Database DevOps, while incredibly beneficial, comes with its fair share of challenges. Some of the top challenges in implementing Database DevOps include: Successfully addressing these challenges involves a combination of technology, processes, and a cultural shift toward collaboration and automation between development and operations teams. How can DevOps help in solving the above challenges? DevOps practices can help address many of the challenges associated with Database DevOps by promoting collaboration, automation, and a systematic approach to managing database changes. Here’s how DevOps can assist in solving the problems mentioned: By combining DevOps practices with these tools and examples, organizations can enhance their Database DevOps capabilities, streamline database management, and achieve more efficient, secure, and reliable database operations. Top Database DevOps Tools Open-Source Database DevOps Tools: Paid Database DevOps Tools: These tools cater to different database systems, such as MySQL, PostgreSQL, Oracle, SQL Server, and more. The choice of tool depends on your specific database technology, project requirements, and budget. It’s essential to evaluate each tool’s features, compatibility, and community/support when selecting the right one for your Database DevOps needs.